• Skip to primary navigation
  • Skip to main content
Tom Woodward

Tom Woodward

Adventures in Food, Fitness, Focus, and the Outdoors

  • Welcome
    • Contact Me
  • Food
  • Fitness
  • Focus
  • Outdoor Adventures
    • Bucket List
    • Photography
  • Newsletter
  • Show Search
Hide Search

Tom

How to Build Good Habits and Break Bad Ones

Tom · Aug 20, 2019 · Leave a Comment

Time to Read: 10 minutes

Habits are everything. We’re trained in habits from when we were children, including potty training and when to cry and when not to, how to smile and when not to, and all these things become habits. These are all behaviors that we learn and that we then integrate into ourselves. What ends up happening when we’re older is that we’re a collection of thousands, maybe tens of thousands of habits we’re constantly running subconsciously, and they’re internalized. And then we have a little bit of extra brain power in our neocortex for solving new problems. So you become your habits.

Naval Ravikant

Almost anyone who’s achieved success in a particular area of life knows that habits are everything. If you’ve successfully run 20 marathons in your life, it’s not because you’re just genetically a good runner. It’s instead about the hundreds of times you’ve decided to wake up, put your running shoes on, and take that first step out the door. If you’re a good salesperson, it’s not just about your personality. It’s the fact that you’ve consistently done years of quality business development by building and refining the habits of qualifying leads, reaching out to them, and closing deals.

For much of what I’ll write about on this site, whether it’s food, fitness, or focus, habits are the bedrock of success. While eating healthy, getting fit, and avoiding distraction in the age of information overload can seem daunting to many, they’re quite approachable since success in these areas hinges on incrementally better habits executed over time. My goal is not to explore quick fixes, but rather sustainable, long term tactics that we can combine with a mindset shift to create a new, better normal. With this applied to food for example, it’s significantly more valuable to learn how to incrementally build the habits required to make and eat a rock solid breakfast every day than it is to go on a crash diet for 3 months.

Understanding the Habit Loop

While books and articles on habit building are ubiquitous these days, the single most effective and well rounded operating manual I’ve found on the subject is Atomic Habits by James Clear. James has spent nearly a decade studying habit science, putting out great content on his blog, and working with thousands of people to determine what works, what doesn’t, and why. According to James, the anatomy of a habit is as follows:

Cue > Craving > Response > Reward

When you really break it down, any behavior you engage in is a way to solve a problem or change a state of being. When I drink coffee in the morning, it’s to change my state of alertness. When I watch Netflix, it’s so I can be more entertained than I was before watching. When I make sales calls, it’s so I can be more successful and earn a living.

These end states of being alert, being entertained, and being successful are rewards. And they’re highly dependent on dopamine, the main neurotransmitter that surges when we encounter a valuable reward. Humans have developed over millions of years to be reward and value seeking animals. While our ancestors valued basic rewards like food, water, and sex, we’ve now broadened to include all manner of rewards into our value system like money, power, fame, material possessions, status, athleticism, beauty, the list goes on and on.

The main point is that we’re highly sensitive to rewards in our environment. And the greater the reward to our dopamine system, the stronger the craving to get it. What completes the ‘habit loop’ is having a cue that triggers the craving, which then elicits a response based on the expected reward.

According to James Clear, you need all four of these in lockstep for a habit to be executed and repeated. To illustrate, let’s consider the Netflix example. For me, the cue is typically location and time based. If I’m sitting on my couch at the end of a long day and digesting dinner, all of a sudden I have the urge to be mindlessly entertained for an hour. However, I never have this urge when I’m in the middle of a bike ride or halfway through my work day at the office. Even though to some degree I always know the response and reward, the cue is absent when I’m biking or working, so the habit of watching Netflix doesn’t happen at those times.

The Four Laws of Habits

Understanding this habit loop is critical in order to stack the deck in your favor when you decide to either implement a good habit or break a bad one. And stacking the deck is critical because….

A good habit will typically have costs in the short run and benefits in the long run while a bad habit will typically have benefits in the short run and costs in the long run.

James Clear

If you’re a smoker, smoking a cigarette right now feels amazing. But it’s a massive cost in the long run to your health. On the flip side, brushing your teeth and flossing every day might feel like an annoying waste of time right now, but it gives you peace of mind that you might save tens of thousands of dollars on route canals later in life.

One thing that’s critical to remember is that many of the topics I’ll discuss on this site require just an ounce of prevention to avoid many pounds of cure later. When I’m doing mobility in the morning, brushing my teeth, or making myself a quick healthy meal, I always get myself in the mindset that it’s worth it to dial in the right daily habits now in order to let compound interest accrue in terms of my health that will pay off down the road.

Understanding the elements of the habit loop, we can move on to discuss Clear’s 4 Laws of Creating Good Habits. These all parallel the four elements of the habit loop, as shown below

  1. Make it Obvious – Cue
  2. Make it Attractive – Craving
  3. Make it Easy – Response
  4. Make it Satisfying – Reward

Make it Obvious

The more obvious you make something, the more likely it’ll be that you do it. A huge amount can be accomplished just by adjusting your environment and intentionally putting something in your field of vision. In one study, the amount of water purchased in a cafeteria compared to soda massively increased just by adjusting where water bottle displays were placed throughout the room.

So make it obvious. If you want to go to the gym in the morning, pack your gym clothes the night before and put your keys on your gym bag. If you want to eat more filling snacks rather than junk food, keep almonds, carrot sticks, or beef jerky on your desk.

One way I make things obvious for myself is using what James Clear refers to as ‘implementation intentions.’ This is essentially making a pact with yourself that you will do something in a specific place at a specific time. For me, it’s as simple as putting things on my calendar. Either leading into a week or at least one day in advance, I add my workouts with the specifics of what I’m going to do to my calendar. Whether it’s a TRX class, swimming, or a HIIT circuit at my apartment, it’s visually part of my day every time I look at my calendar. This simple idea is extremely powerful if you’re able to get into a mindset where you treat these appointments as sacredly as you would a work meeting or dinner with a friend. They’re appointments you make with yourself that you do not break unless an emergency comes up. This system also works extremely well for scheduling blocks of time where you do business development, deep work, writing, reading, or anything that involves an appointment with yourself.

In order to break bad habits, just invert ‘make it obvious.’ If you find yourself watching TV in bed and want to read more or sleep better, don’t just gut it out and relay on willpower. Take the TV out of your bedroom and better yet, give it away or sell it and just use the one in your living room.

Make it Attractive

When it comes to the craving aspect, attractiveness is where dopamine hooks us. Studies have even found that dopamine spikes before a reward comes, as is the case when someone simply sees pictures of calorie dense processed food. The same thing happens when you see an Instagram banner pop up and feel the urge to check (response).

I get the same hit every time I see the HBO intro logo pop up before a show thanks to years of Entourage, The Sopranos, and Game of Thrones. They’re habit geniuses to play a soothing bong noise while showing you their logo and then jumping straight into a slick opening theme with catchy music in all of their shows. Now when I even just see the HBO logo, I’m conditioned to want to watch one of their shows.

So the question becomes, how do we create a craving for good habits? This can be a challenging element since I discussed how most good habits can be costly in the short term, which naturally makes them less attractive. In an MRI of brain activity, people’s reward centers light up when they see pictures of pizza and ice cream, not broccoli and brussels sprouts.

Similar to how environment is crucial for cues (make it obvious), it’s also a key element to make something attractive. This is where the ‘you’re the average of the 5 people you hang out with’ rule comes into play. If your friend group likes to eat pizza, drink beer, and watch TV five nights a week, that will be the ‘attractive’ thing to do to fit in, which is a big component of our value system as social creatures. However if your friend group likes to rock climb on week nights and mountain bike on weekends, odds are being lean, strong, and kicking ass at those two things will be attractive to you. For health, this doesn’t mean you need to be a jock either. If your group of friends has a photo share and text thread about healthy vegan recipes, odds are you’ll cook more and eat healthier. And if you have a membership at a pottery studio, you’re more likely to go often, enjoy the deep single task focus it provides, and get better by learning from the people around you.

If you’re friends aren’t super healthy, I’m not saying you should ditch them. Instead, just try to incrementally leverage healthier environments. If you enjoy running, join a running group. If you want to be a better cook, take a healthy cooking class. Be open. Try to connect with people who enjoy the things you aspire to. In an age where we’re falling deeper and deeper into screens, this re-discovery of connecting with like minded people in person may be the next generation’s greatest challenge. But the rich conversation and sense of well being is so much more fulfilling and rewarding than trying to go it alone on goals or just learn everything through the internet.

Make it Easy

The easier a response is to be performed, the more likely it’ll be initiated on a regular basis. This lack of friction is a staple characteristic of consumer facing companies that rely on your time, attention, and dollars. You can buy things on Amazon with one click. Instagram use is powered by super simple swipes and double clicks. Netflix and YouTube now autoplay videos so you can start the action of watching without even physically doing anything. ‘Fast’ food was built on the premise of getting something delicious quickly and easily.

When it comes to building good habits, this is where ‘incremental’ is key. Since cues are so important over time to building habits, just doing anything as a response is good enough to get you started. This is where James Clear implements his ‘2 Minute Rule’ in which he urges people to start by performing a habit for just two minutes that they’re trying to eventually repeat on a regular basis. For me, this could be two minutes of stretching in the morning, a two minute walk to clear my head and reset between blocks of work, two minutes of sales calls, or reading a book for two minutes before bed.

At first, this may seem useless and ineffective. But stick with it long enough and it’s surprisingly effective. Every day, I now do a 10 minute mobility routine after waking up, 60 minute blocks of sales calls during the day, and 15 minute walks where I get some sun, practice being present, call a friend, and clear my head for the rest of the work day.

For bad habits that you want to break, you want to increase friction and make it harder. Processed food is tempting enough at work or restaurants, so I never buy it at the store to keep it out of my apartment. I don’t trust myself with Instagram, so whenever I want to post, I download the app, post, and then delete it again to increase friction.

Make it Satisfying

The final piece of the puzzle in the habit loop is the reward. If a reward doesn’t come often or powerfully enough, the habit won’t stick. When it comes to reward, one thing we’ve discovered is that we’re much more likely to get ‘hooked’ on something when the prize is variable rather than consistent. In the 1950’s, the father of behavioral psychology, B.F. Skinner, did a now famous study involving pigeons. He found that while they were enticed by food to perform a certain action, they were much more excited when they received the food occasionally but not all the time after performing the action.

Entire industries have been built on this premise of variable reward. Slot machines provide variable reward, as does Instagram or Facebook when you log in to see what and how many notifications you have. Everyone knows the feeling of posting an IG pic then logging in over the next few hours to see who liked and commented. Sometimes you see a lot of likes, sometimes a little, and there’s a massive pull to keep logging back in frequently.

One way I’ve found that you can harness this effect for good is with exercise and sport. The key, however, is finding things that allow for building skill and ability over time. Think about tennis, running, or even a workout program like CrossFit. If you’re trying to improve, the process involves constantly learning, as well as good days and bad days. You crush some workouts and feel on top of the world while others are a challenge. Some days when I play tennis, I’m on fire and can’t miss. Others, my timing is off. This is variable reward in action. And the good days keep you coming back for more.

If you want to harness this effect, you can’t simply go watch TV on a treadmill while running for the same amount of time at the same speed every week. This might work for you, but variable reward won’t keep you coming back. To make it satisfying, find something that involves incrementally building skill and improving. To double down on this, use the ‘make it attractive’ strategy of joining a group, club, or class to stay motivated and build skill even faster.

Summing Up

While the 4 Laws of Behavior may not apply to everything in life, they come pretty darn close, which makes it a powerful framework. With anything in life that you’re trying to build or break, use the following short hand:

When Trying to Build a Good Habit…

  • Cue – Make it Obvious (Gym bag packed and next to the door)
  • Craving – Make it Attractive (Join a running group of people who value fitness)
  • Response – Make it Easy (Start by doing anything difficult for 2 minutes and build from there)
  • Reward – Make it Satisfying (Harness variable reward with positive habits)

When Trying to Break a Bad Habit…

  • Cue – Make it Hidden (Remove all junk food from the house)
  • Craving – Make it unattractive (Keep in mind the health consequences of eating badly)
  • Response – Increase friction (Delete Instagram every time you post so you have to download it again if you want to check anything)
  • Reward – Make it Unsatisfying (Keep tallies of bad habits to truly reveal how often you do them)

Deep Dive…

James Clear on the 3 R’s of Habit Change

Atomic Habits – James Clear

Hooked – Nir Eyal

To get a weekly email with my favorite books, articles, and resources with no spam ever, please subscribe below

Newsletter #1: Reading Lists & Backpacking Through Patagonia

Tom · Jul 26, 2019 · Leave a Comment

Time to Read: 3 minutes

Welcome! It’s been a while since I’ve done any writing and I’ve decided to jump back into the fray with a new blog dedicated to exploring health, focus, and the outdoors. As a onetime personal trainer and nutrition consultant who now works a 9-5 desk job, my goal is to provide actionable information and tactics on the best routes to staying healthy and focused while also saving time.

It strikes me that more and more these days we’re unfocused, overloaded with information, constantly multitasking, and lacking time to stay fit and make quality food. These are the things I and those around me struggle with every day. My aim is to tackle those issues and more with the following…

Nutrition – Recipes, habits, and strategies for staying lean and healthy, eating good food, and never counting calories again.

Fitness & Mobility – Workouts, exercises, and systems to find joy in fitness, troubleshoot pain, and stay injury-free to keep crushing whatever you love to do in life

Focus & Flow – Philosophies and tactics to stay present, fight distraction, avoid information overload, break digital addictions, and do your best work in less time.

Outdoor Adventures – Hiking trip reports, gear guides, events, photography, and other resources on getting outside and experiencing nature

For many of the things I’m interested in, an ounce of prevention is worth a pound of cure, which is why small, incremental habits can be life changing if done consistently over time. Making a tweak to your breakfast routine could help you avoid obesity in the long run. Doing 10 minutes of smart mobility work every morning could prevent lower back pain or tendinitis. Sticking to the habit of not checking any social media after 7PM could give you time to read, take a class, do high quality work, and/or sleep better.

Habits and mindset are everything, which is why most of what I write about and suggest will be focused on actionable ways to adjust these two things. If you want to do deep dives anywhere, I’ll link to books, articles, podcasts, and other source material for reference. I’ll be continuing to build out my Resources section with a hit list of all of my favorites.

Newsletter – Every two weeks, I’ll send a single short email with recent posts as well as 5-10 links I found helpful and fascinating. No spam ever, just quality content. Sign up below:

To kick things off, here are two posts: A list of my favorite set of books for understanding how we think and act as well as a complete guide to hiking Torres Del Paine National Park in Patagonia. Enjoy!


Recent Blog Posts

8 Books to Understand Your Thoughts, Behaviors, and Habits for Better Decision Making

In order to build good habits and understand why we fall victim to bad habits, it’s crucial to understand what underlies out thoughts and behavior. These are eight of my favorites on the subject. They’re brilliantly written in a concise and straightforward way to give you immediate takeaways.

Sapiens is one of my favorite books of all time and a must-read for understanding human behavior. It’s a whirlwind tour through the history of our species and I’d highly recommend picking it up if you only have time to read one.

The Complete Guide to the Torres Del Paine Circuit Trek

If backpacking is your jam, Torres Del Paine National Park in Patagonia is an absolute bucket list trip. The circuit trek is a fully immersive experience; 80 miles of trekking over 5-8 days through forest, plains, and alpine passes, while skirting glaciers and granite peaks. This post is a complete trip report and gear guide to everything you need to plan and execute the trek of a lifetime. If you or any friends are contemplating a trip to Patagonia, check it out for reference.


What I’m Reading…

(Podcast) Cal Newport on Digital Minimalism: Why Focus is the New Superpower – Rich Roll

(Article) Why ‘Workism’ is Making Americans Miserable – The Atlantic

(Article) – The Complete Guide to Setting up Your Phone to Work for You and Not Against You – Medium

(Podcast) – Rare Introspection and Epiphany About Meaning & Fulfillment from a Top Level Fitness and Health Personality – Ben Greenfield

(Article) The Negative Effect of Social Media on Mental Health – Forbes

(Article) How to Optimize Your Running Technique – Todd Hargrove

The Torres Del Paine Circuit Trek

Tom · May 15, 2019 · Leave a Comment

Time to Read: 32 minutes

Our Itinerary, Gear Guide, and Everything You Need to Know

We need to protect these areas of unaltered wildness and diversity to have a baseline, so we never forget what the real world is like—in perfect balance, the way nature intended the earth to be. This is the model we need to keep in mind on our way toward sustainability

Yvon Chouinard

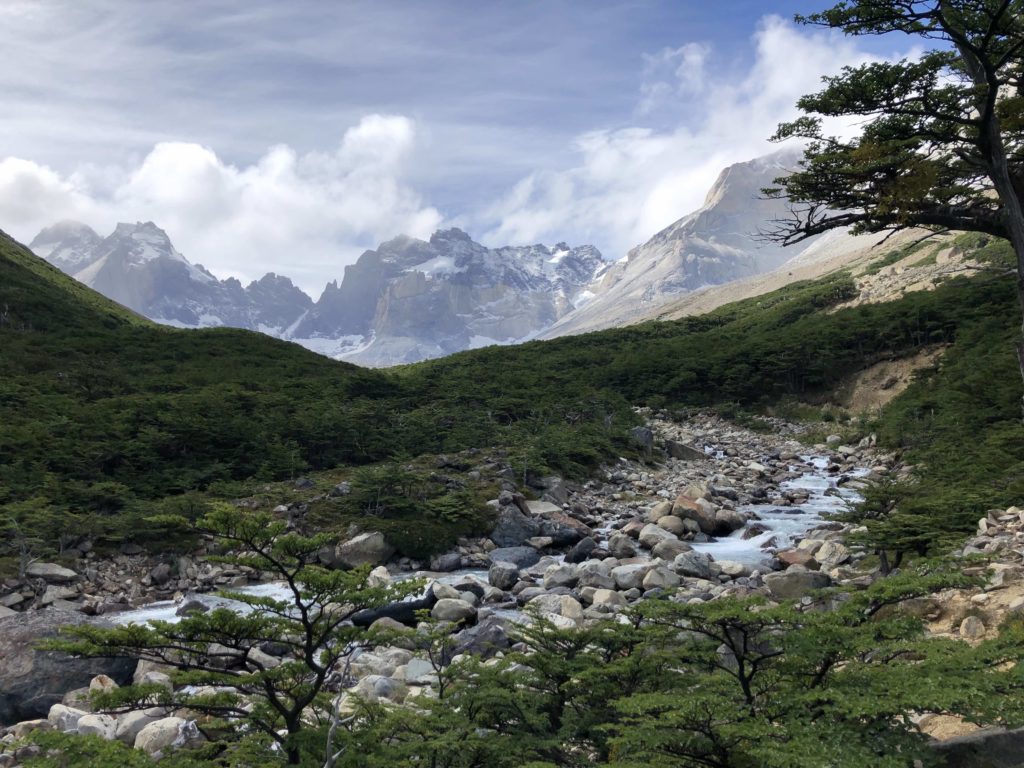
Torres Del Paine National Park in Chilean Patagonia is without a doubt a bucket list trip for anyone who loves backpacking. It’s every bit the full experience: Snow capped peaks, granite spires, calving glaciers, ice blue lakes, forest, river valleys, and grasslands. You see it all while trekking 80 miles on dirt, grass, scree, and rock through sunshine, snow, rain, and occasional hail.

Interested yet?? Despite the indescribable landscape, getting there is no joke! Hopefully this guide will serve to make things a bit easier for you to plan your trip, bring the right gear, and make sure things go smoothly along the way.

Torres Del Paine (TDP) is certainly no quick trip to Yosemite. If you’re traveling from North America, strap in for a minimum of three planes, three buses, a dozen passport flashes, and a tidy amount of organized printed paper with reservations and tickets just to get yourself in the park. The travel seems to weed out most folks since TDP sees 250,000 visitors a year whereas Yosemite gets 500,000 per month in their high season.

This guide is lengthy and wide ranging, so skip to the sections below if you want to check out specific parts and feel free to contact me anytime if you have questions, comments, or corrections!

  • Intro to Torres Del Paine
  • How to Book Campsites
  • Getting to Torres Del Paine
  • Hiking the Circuit Trek & Sample Itineraries
  • Hiking Time/Distance Chart
  • What to Pack

For more great hiking trip reports, gear guides, and ideas for outdoor adventures, sign up for a non spammy every other week email below:

Intro to Torres Del Paine

Sara taking it all in at the base of the Torres
  • Location: Torres Del Paine National Park, Chile (Patagonia Region)
  • Trip Type: Fully or partially self supported backpacking
  • Length: 80 miles
  • Elevation Change: 20,000 feet
  • Duration: 5 – 11 Days

TDP is located in Chilean Patagonia near the southern tip of South America where Chile and Argentina converge. It’s a lower link on the astounding chain of 17 national parks in Chile that run 1,500 miles north-south down the western side of the country. Kristine and the late Doug Tompkins (founder of the North Face) of Tomkins Conservation are responsible for gifting a great deal of this land for national protection over the years.

The park is heavily protected by CONAF, the Chilean organization similar to our National Parks Service in the United States. There is strict enforcement of staying on trekking paths, sleeping in designated campsites, and cooking only with propane stoves in cook tents and kitchens. There is zero tolerance for backcountry camping, cooking, or trekking at night, any of which can get you booted from the park.

What is the ‘O’ Trek?

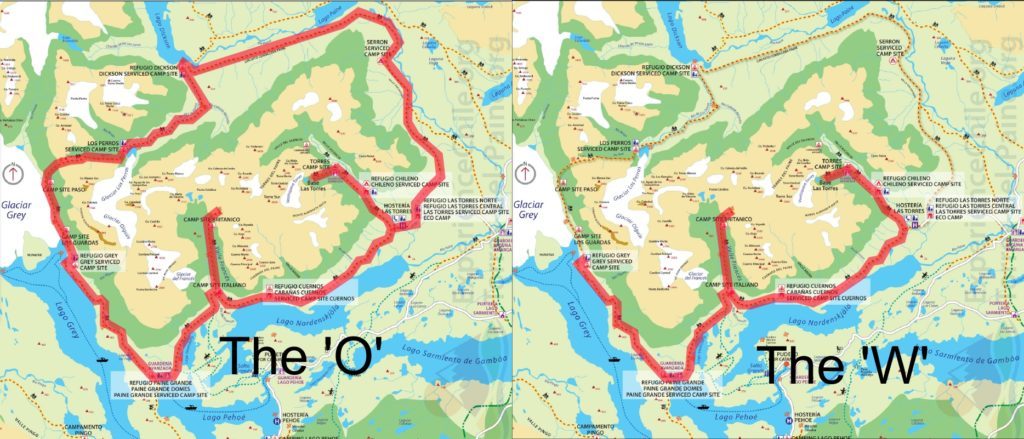
The ‘O’ (or Circuit Trek) is the less famous and more difficult sister trek to the hugely popular ‘W’ Trek in TDP. The trek circumnavigates the three famous granite towers (Torres) for which the park is named. Lay down the O or W on a map and you can easily get the gist of the hikes; the O is a circuit around the park while the W is a W-shaped zigzag through the highlights of the southern end of TDP. The W is technically included within the completed O in addition to the ‘backside’ (north section) which completes the O.

Props to Switch Back Travel for the graphic

Which Trek Should You Do?

We’re biased, but our experience on the O was a world above the W sections. If you’re fit, enjoy backpacking, and want the full experience of a world class national park without all the crowds, do the circuit without question. Everything is notched up back there from our perspective: the quaintness of the camps, the rugged trails, the variance in the landscape, the challenge of the hiking, and the camaraderie of the small group of folks attempting it. You’ll experience four seasons in a day, hike through forest, scree, and open plain, cross rushing rivers and mountain passes, all while looking at snow capped mountain peaks, ice blue glacier lakes, condors, wild horses, and maybe even a puma. And it’s the type of hiking that makes dehydrated food, trail mix, and rice taste like a Michelin star meal.

That said, if you like shorter hiking trips, don’t mind crowds, and/or want a few more creature comforts, the W is still plenty challenging and spectacular.

‘Macizo Grande’ by the Numbers

Driving down the road the day after finishing the circuit trek, Sara was sitting in the back, me in shotgun as our charming, laid back fly fishing guide Sebastian was casually driving along sipping coffee, making small talk about Chilean rivers and asking us about our trip to the park. After telling him we just did the O Trek in 6 days, he flashed a smile and nodded his head approvingly. He leaned in a bit and said from now on since we’ve done it, we should call it Macizo Grande, not the O or the Circuit. I got the feeling that Sebastian hearing ‘O Trek’ brings about the same nails on a chalkboard feeling I get when someone calls my city ‘frisco.

Sebastian was a paragon of patience with us for 6 hours

You quickly notice that doing the Macizo self-supported is a badge of honor, even among locals. And once you’re out there, it becomes abundantly clear why. Here are the stats on what we experienced over our 6 days in the park in early January:

  • Total Distance: 80.5 miles
  • Total Ascent and Descent: 21,560 feet
  • High Hiking Temp: 70 Degrees F
  • Low Hiking Temp: 33 Degrees F
  • Hiking Weather: Sun, Rain, Hail, Sleet, Snow
  • Winds: Avg 25mph with gusts up to 80-90mph
  • Terrain: Single track dirt, rocks, scree, roots and the occasional Indiana Jones style suspension bridge

November – February are high seasons, with the summer solstice falling on December 22nd. TDP falls almost exactly on the 51st parallel south latitude line, putting it as far south of the equator as Newfoundland is north of it. As the crow flies, head directly south from Maine for almost 7,000 miles and you’ll be there. The extreme low latitude made for eerily long summer hiking days with 16 hours of light (18 hours on the solstice!) where the sun would hang seemingly motionless for half a day. It’s a backpackers dream to hike in this kind of light, bookending your days with sun for both cooking meals and setup/breakdown of gear before and after trekking.

How to Book Campsites

Spread relatively evenly around the Circuit trek are 11 different campsites. As mentioned, there is no backcountry camping and you’re required to stay at the campsites every night. A key to understand is the traffic on the backside of the Circuit trek is heavily regulated (only 80 people per day) and can only be walked counterclockwise (whereas you’re allowed to do the W in either direction).

**Note that the headcount regulation is via the campsite slots available, so your campsite reservations ARE your passes to do the trek. If the slots are sold out for a particular day at a particular camp, then you’re SOL. Once booked online, reservations must be printed out and shown on multiple occasions: when you buy your park pass, when you log in at ranger checkpoints, and when you check into each camp.

Don’t mess with the Rangers

While not quite as in demand as say a Mt Whitney Summit pass, Half Dome permit or Yosemite campground, the TDP campsites are definitely in the same ballpark in terms of needing advanced booking. Adding to the complexity is the fact that three different companies administer the 11 campsites, which means three different websites for booking.

If you’re starting at Torre Central as we did, the campsites you can stay at in order around the circuit are: Seron, Dickson, Los Perros, Paso, Grey, Paine Grande, Italiano, Frances, Los Cuernos, Chileno, and Torre Central.

The booking sites for the companies, Fantastico Sur, Vertice, and CONAF, are listed below alongside the campsites they operate:

Fantastico SurSeron, Frances, Los Cuernos, Chileno, Torre Central
VerticeDickson, Los Perros, Grey, Paine Grande
CONAFPaso, Italiano

Due to the high demand and how strictly these reservations are enforced by CONAF rangers, it’s key to plan this part of the trip early. All three booking sites open up their reservations about 6 months in advance. The off season of the park when the camps don’t operate is typically end of April through sometime in November, so planning your trip in the December – March window is ideal. Our experience in early January was fantastic with lots of light and good weather.

Which Camps Should You Book?

When it comes to booking camp sites and planning the length of your trip, think long and hard about the preferences and abilities of your group. We did the circuit on the very fast side at 5 and a half days, but we met folks who were hiking slower and staying at more camps along the way who did 8, 9, or even 10 day trips. While it’s certainly challenging, doing this the trek on the longer end is accessible for just about anyone who can hike 6-7 miles in a day.

Before booking, take a look at our Hiking Time/Distance Chart to give you a frame of reference for mileage and elevation between campsites.

The camps all have various amenities and quirks to them due to being administered by different companies in addition to factors like location, weather, terrain, etc. One constant is that all of the camps have flush toilets, potable water from taps, cook tents/kitchens, and showers (though sometimes not hot) which already makes it much more cushy than most true backpacking trips.

  • Post hike check in at Seron
  • Mini mart at Grey!
  • Superb kitchen at Paine Grande
  • Bathrooms and showers
  • Room with a view at Seron

All of the Vertice and Fantastico Sur camps have well supported options available such as tent, sleeping bag, and sleeping mat rentals, along with dinner and packed lunches. When reserving, you can see an option called Camping ‘full team’ and ‘full board’ which means all of the rental gear and meals for a particular campsite. There is also a super nice (and expensive) option at Grey, Paine Grande, Los Cuernos, Chileno, and Torre Central called ‘Refugios’. These are essentially hostel-type indoor bunk rooms where you can sleep on a twin bed with a common bathroom and shower.

In general, the campsites on the front side (W portions) that have the Refugios are incredibly well stocked. Grey and Paine Grande both have a bar, restaurant, and fully stocked store where you can re-up on things like lentils, tuna, snacks, wine, beer, propane, and other basics. Frances has a store and to-go pizza and Los Cuernos, Chileno, and Torre Central also have bars and restaurants. You could go super light and just bring enough food for the 2-3 days on the backside of the O and then buy and eat as you go for the whole W section.

  • Cuernos Refugio bar
  • Lounge at the Torre Central Refugio
  • Wine at Torre Central after the trek!
  • Wisdom in the Cuernos kitchen
  • Private lodges at Cuernos

Other than the final nights we spent at the Torre Central Refugio at the end of the trek, Sara and I wanted a true 5 day backpacking experience, so we brought all our own camping gear, kitchen supplies and food, as did most folks who did the Circuit. Obviously carrying that much gear and provisions will massively bump up pack weight (see our What to Pack section), so know that the option is there to do this trek quite light if you rent gear and eat along the way.

The Journey to Torres Del Paine

The most common large international hubs on the journey to TDP are Santiago, Chile and Buenos Aires, Argentina with most American Airlines connecting flights going through Miami or Dallas. From there you hop on regional airlines to either Punta Arenas, Chile or El Calafate, Argentina. Our route was 4 hours south from Boston to Miami, 9 hours south to Buenos Aires, and 3 more hours south to El Calafate. The silver lining to all that north/south air travel is that they’re only three hours ahead of EST, making jet lag minimal.

Straight out to explore Buenos Aires after a red eye

After taking a hassle free red eye down to Buenos Aires, we had a great experience flying in country to El Calafate on Aerolineas Argentinas. Great service, big planes and no delays going either direction. Note that there are two airports in Buenos Aires (Eziza “EZE” and Jorge Newbury “AEP”). EZE is the international hub whereas AEP is domestic, however some Aerolineas and LATAM flights go out of EZE. They’re about a 45 minute taxi ride apart from each other.

Hit a cash machine as soon as you get to EZE and take out Argentine Pesos. During our trip, $10 USD was about 375 pesos. Both Argentina and Chile are well set up to accept credit cards at hotels, restaurants, and shops, but keep a few hundred USD worth of pesos handy for tips (10% customary and you can only tip in cash), small items, and taxis.

Flying into El Calafate looking north towards the glacier blue Lago Argentino

Once you arrive in El Calafate, it’s a 25 minute taxi to town (650 pesos). Have a room booked for the night to prep for the early morning 7 hour cross border bus ride to Puerto Natales, the quaint little town just outside TDP. We stayed at both the Wyndham Esplendor and Xelena Hotel during our two trips through El Calafate and highly recommend both. They were about $150 USD per night each and had fantastic food, drinks, and spa/sauna/pool services.

The bus to Puerto Natales leaves from the El Calafate bus station at 7:30AM and I recommend buying your round trip tickets from Cootra in advance (**remember to print your tickets prior). Though the border crossing and customs check on the bus from Argentina to Chile is a slight pain, it’s a comfortable ride and you can take pleasure in sleeping your way through as most of the scenery is hay colored plains, open roads, and a sporadic guanaco (llama relative) and ostrich sighting.

If you take the route of flying into Santiago, the bus ride from Punta Arenas is a bit over 3 hours and you stay in Chile the whole time. If TDP is the main focus of your trip and you want to eliminate the hassle of crossing borders, the Santiago/Punta Arenas route is your best bet. However, Sara and I wanted to combine TDP with El Chalten (two hour bus north of El Calafate), a gem of a town home to delicious hole in the wall restaurants as well as the Fitz Roy (inspiration for the Patagonia company logo) and Cerro Torre, two magnificent igneous granite formations with a villainous amount of character that need to be seen in person up close before you die. It’s an all around awesome hiking and climbing town that we highly recommend.

Patagonia zip ups…not just for venture capital meetings
Looking back down the valley from the Fitz Roy Trek towards Chalten in all it’s canvas oil painting-like glory

Note that flying across countries regionally is EXTREMELY expensive, ie flying from Buenos Aires to Punta Arenas or Santiago to El Calafate. So stick with flights within the same country to make it more cost effective.

Puerto Natales to Torres Del Paine

Puerto Natales is a funky little town that sits right up against the Chilean fjordlands and reveals a sweeping waterfront view of snow covered peaks to the west, hinting at what’s to come in TDP which lies generally in that direction but a bit north.

The Puerto Natales waterfront

Once you reach the main bus station via either El Calafate or Punta Arenas, here are a few tips:

  • Buy your bus ticket into and out of the park for whichever day you’ll be traveling in. Bus Sur and Bus Gomez are good options and their windows are right there in front of you when you get to the bus station. We used Bus Gomez and they had 7AM or 7:15AM options into the park then a return bus at 2:30PM on the day we left.
  • Hit the cash machine to take out Chilean Pesos and get your brain ready to jump amounts by a factor of 20 compared to Argentina. $10 USD = 6,700 Chilean Pesos. Similar to Argentina, all tips in Chile are in cash even if you pay for something with a credit card. The people and service were top notch in our experience, so it’s the right thing to do to tip the expected 10% for service. It’s also great to have cash on hand for the park to pay for the shuttle bus and random food or drink items, though credit card readers are surprisingly abundant at camps throughout the park.
  • Go to the end of the station and find the CONAF (Chilean governing body of national parks) desk where you can purchase your park pass. This is a really quick and easy way to skip a line in the park and pay for your pass with credit card. Note that you’ll have to show your campsite reservations at this point to prove you can complete the circuit at the spots you’ve booked.

Note on buffer times: You’ll want to build in at least a day buffer either in El Calafate/Punta Arenas or Puerto Natales. The campsite reservation days are exact and the rangers are strict. Arriving a day late may not be a deal breaker, but it could be. We had an overnight everywhere just in case (Buenos Aires, El Calafate, and Puerto Natales).

Also note that buses tend to be very prompt in our experience. If you show up 2 minutes after the departure time to the station, there’s a good chance the bus is gone. Try to get to each bus 30 minutes in advance just in case.

One of the key bookings of this trip for us was to be sure we stayed at the same hotel in Puerto Natales both the night before leaving for our trek and the night after getting back. By finding a good hotel that will store your luggage for the duration, you can leave nicer clothes and items in rollers or any other suitcase that you don’t want to bring along to the trek. We highly recommend Simple Patagonia Hotel in Puerto Natales, our favorite hotel of the entire trip!

The view from the Simple Patagonia dining room

The day you go into TDP, cab or walk back to the bus station with your hiking backpack and hop on Bus Gomez or Bus Sur. As you drive north on route 9, the park will slowly unveil itself near the end of the two hour trip and you may even catch an early look at the Torres themselves. The first stop is the Laguna Amarga entrance to the park. This is where it comes in very handy to have bought passes at the CONAF desk at the bus station the day before as most people get in line to buy those same tickets at Laguna Amarga.

That smile when you don’t have to wait in line for a park ticket

We bypassed this line and walked straight to the shuttle area to wait for the smaller bus that takes you further into the park to the Torre Central welcome office and the start of the trek. The shuttles are typically timed well to arrive at the same time a Bus Sur or Bus Gomez is arriving at the park, so we were able to jump on one within 5 minutes.

15 more minutes on the shuttle and you’ll arrive at the modern looking CONAF administration office at Torre Central and it’s time to start the trek! When you exit the bus, you can check in with the front desk and then head off to the right side of the building and take your first steps toward Campamento Seron.

Hiking the Circuit Trek!

19 miles?? Then 16 miles over the pass!??”

Sara’s first words after I excitedly told her our circuit trek itinerary back in September. Those 19 miles she was referring to was our second day from Seron through Dickson and ending at Los Perros, with the 16 miles being the third day trek from Los Perros over the John Gardner Pass (the high point of the trek), through Paso and Grey camps, ending at Paine Grande.

The ascent from Los Perros to John Gardner combined with the following descent to Paso camp is the most challenging stretch of the whole trek. Both legs are rated as highly difficult by CONAF and there’s a mandatory weather check with the Los Perros rangers to confirm the pass can be attempted every day due to frequent snow flurries and gale force winds.

To put in perspective what I was proposing: Not a single person of the 30 who stayed the first night at Seron with us skipped Dickson for Los Perros. And of the 25 at Los Perros, only half skipped Paso to stay at Grey and zero skipped Grey to go to Paine Grande. And with good reason. It was 35 miles, 9,000 feet of elevation change, and highly unpredictable weather carrying 40+lb packs over two days.

more hiking???

Why did I choose to book an itinerary that skipped three of the first 6 campsites? Because that’s what happens when you book 2-3 months out instead of the 6 months I recommended earlier! It was either Seron, Los Perros, then Paine Grande or no circuit trek.

If you start planning early enough to get any itinerary you want around the Circuit, put some thought into what’s important for you and your group. Sara and I are not ones to sit still and we really enjoyed using most of the 16 hours of daylight to hike, so our itinerary actually worked out well for us. Other folks we met liked to hike more slowly and relax in camp for a good chunk of each day. Also know that all miles are not equal in TDP. CONAF does a great job of rating each camp to camp leg from easy to difficult. They also list trekking times which we found to correspond to a slow to average hiker. Below is our itinerary, some more info on the camps and trails, as well as a few changes and sample itineraries you could use.

Day 1: Puerto Natales to Seron

After jumping on the 7:00AM Bus Gomez from Puerto Natales, we caught a well timed shuttle that pulled into Torre Central around 9:15AM

Note that an alternate starting point for the trek is Paine Grande and you can stay on Bus Gomez that will take you to the Pudeto stop after Laguna Amarga where you board a catamaran that drops you at Paine Grande. If you go this route, your starting and ending points for the trek will be Paine Grande rather than Torre Central so adjust your itinerary accordingly.

Ready to hit the Circuit Trek!

We hit the trail at 9:30AM and eased in nicely with fast hiking on dirt single track over rolling hills, meadows, streams, and trees with only light wind. After months of anticipating the legendary wrath of Patagonian weather, we were delighted to start on a calm bluebird day in t shirts. Take note that they’re very serious about conservation in TDP. You can’t stray too far off the trail and all propane stove cooking (no fires!) must be done in cook tents or kitchens at camps, so all lunches should be eaten cold and within sight of the trail. Streams with drinkable water are abundant across the trek even in the height of summer and all tap water in the camps is potable, so you can get away without a filter.

Trailside lunch #1…an expansive menu of lentils, lentils, and lentils

After lunch and more fast hiking through a spectacular valley, we were given a nice forced break standing in awe as a band of wild horses crossed the trail.

We came into Seron about 1:30pm after 8.2 miles of hiking and a little over 1,000 feet of ascent.

The camp is a basic set up: main building with Fantastico Sur check-in and a small restaurant that serves pre-booked dinners and lunches (‘full board’ when booking on the website). There’s also a cook tent, toilets, showers, outdoor sink, and trash service.

White Tevas are a real fashion statement in camp

As you can see above beyond ours, the rental tents at Seron (like most other campsites) are pre-pitched on platforms, so they’ll be set up for you when you arrive if you choose the rental option. Our recommendation is to just bring your own light tent. You’ll save money and save your back (sleeping on wooden boards even with a pad is not super fun).

Check in with Fantastico Sur wasn’t until 2PM, but if you have your own tent you can just find a good spot and start setting up and hanging out. At every camp, do your best to find a sheltered spot either by trees, bushes, or any other protection and use tents stakes every single night even if it’s not windy when you go to bed. Patagonian wind is relentless and unpredictable and we occasionally woke up at 2 in the morning with wind bending our tent roof inches from our face.

Day 2: Seron to Los Perros

Sara and I woke up at 6AM on day 2 with a big day ahead of us…18 miles of hiking from Seron through Dickson and all the way to Los Perros. A daunting task as everyone we talked to at Seron camp the night before was only going as far as Dickson that day to camp. We ate breakfast and cooked up some rice for lunch in the kitchen tent and then hit the road by 7:30.

Room with a view at Seron

It’s more fast single track hiking with a testy climb about two miles in where you gain 700 feet over half a mile. Cresting the climb, we were hit with both a spectacular view and a jet engine of an 80-90mph headwind that would have carried toddlers and small pets off the backside of the pass.

The next 8 miles to Camp Dickson was one of our favorite stretches of the entire trip. The trail is flat and fast, following Lago Paine along the valley to Lago Dickson and enveloped on either side by snow capped peaks. The small camp sizes on the backside of the circuit and the fact that you can only trek counterclockwise creates extreme solitude. Sara put it perfectly that you get great perspective in those moments on how small human beings truly are in the world.

My little human

About halfway between Seron and Dickson is the Coiron ranger station. **Note that you must check in here, sign the log book, and show your camping reservations for the upcoming night.

We rolled into Dickson around noon after 11.3 miles and 4 hours of active hiking time. It’s a stunning lakeside camp run by Vertice with a well built kitchen house and an expansive meadow for pitching your tent. If you like to hike easy, hang in camp, and experience unmatched tranquility, take your time on the backside of the circuit and stay at Seron, Dickson, and Los Perros.

The indescribable back side of the Circuit Trek

But Sara and I are antsy and still had 9 hours of daylight, so we were amped to push the additional 7 miles on to Los Perros for the night after lunch. The Dickson to Perros section gives you a good dose of Lord of the Rings scenery…a steady climb almost a thousand feet over 6 and a half miles through dense forest while tracing the banks of a glacier river as you feel the snowy peaks loom ever closer as you rise into the alpine zone.

We strolled into camp at 4:45PM, 9 hours and 15 minutes after we left Seron. We covered 18.57 miles with 3,950 feet of elevation change in 7:08 of actual hiking time.

Day 2: Seron to Los Perros, with Dickson at the 11.3 mile mark

The first stop at Perros is the ranger station, both checking in to sign the book and confirming your departure the next morning for John Gardner Pass. We’d heard rumors online that the rangers make you check in for departure prior to doing the pass each morning and occasionally close it due to bad weather. However, we later heard from others behind us on the trek that they were allowed to do the pass in a near whiteout the following day. In reality, the setup is much less strict than we had envisioned. You check in with them the night before when you arrive and then you’re free to get up anytime in the morning (even before dawn) and jump on the trail.

Our big dinners every night at camp were courtesy of Backpacker’s Pantry

Los Perros is a quaint little Vertice camp set into the forest with good shelter from the wind. It’s a fairly high camp at 1,700 feet above sea level compared to Seron at 500 feet, so get the layers ready. The camaraderie and energy in the small kitchen house at Perros is super cool with everyone anticipating the pass the next day.

Day 3: Los Perros Over John Gardner Pass to Paine Grande

This was the day that raised a lot of eyebrows when we showed it to rangers and CONAF workers. The 18.6 miles we covered on day 2 over 7 hours, 8 minutes was estimated by CONAF on the park map to take 12 hours. The 16.5 miles we had ahead of us on day 3 was estimated at 16 hours due to the difficulty. So just to be safe, we were up early.

Pre dawn 5AM wake up call for the biggest day of the trip

Sara and I pounded down some granola and cold instant coffee, stashing some RX bars and energy chews for easy access while climbing the pass. We filled our water bladders and hit the trail just after the break of dawn at 6AM.

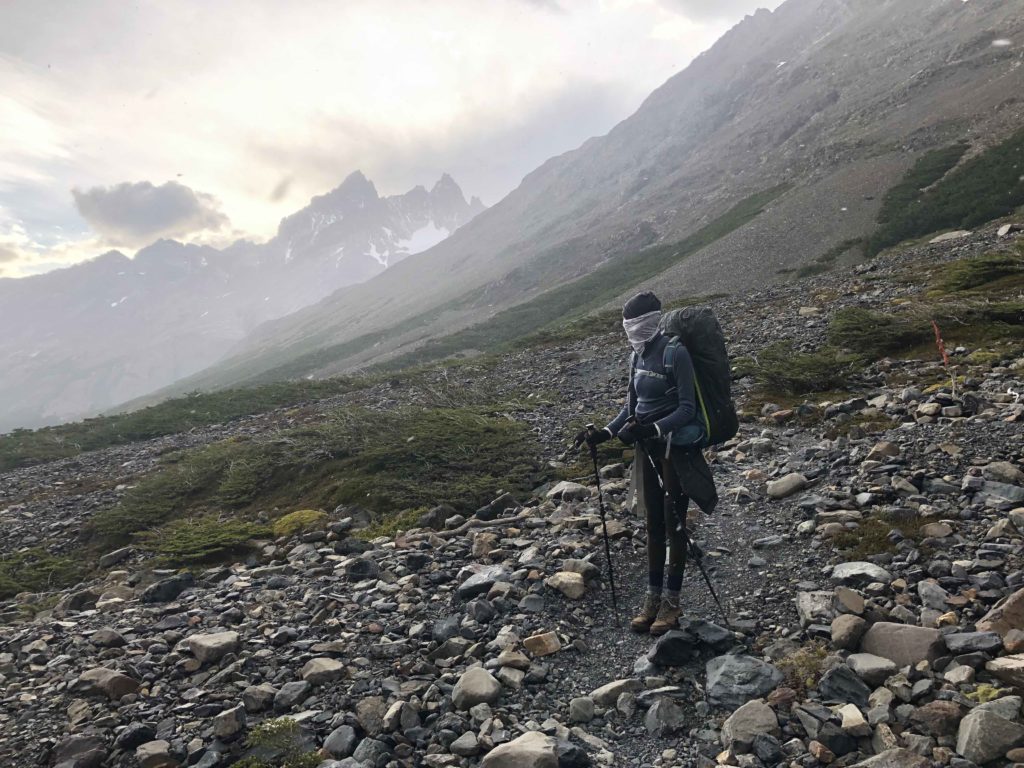
The next three miles was a mesmerizing 2,300 foot climb over rock and scree with a light snow falling all around us. Though the temp dipped into the 30’s, the wind was minimal (for Patagonia) and our weather was overall fantastic, giving us a satisfying view of the valley from which we just climbed. As mentioned earlier, the following day on the pass was a blizzard so you have to be prepared for anything.

Diagonal splendor

An hour and 45 minutes in, we hit the top of the pass and felt a rush of adrenaline as we crested John Gardner and laid eyes on the indescribable Grey Glacier on the other side. It’s a massive sheet of ice that’s twice the size of San Francisco (100sq miles), rises 100 feet in height, and is sadly retreating like most glaciers today.

Grey Glacier with it’s flowing stitchwork of crevasses

After the elation of hitting the pass, we descended into the treeline and started the downhill push towards Paso camp. This was a very challenging section; a 1,300 foot descent over a mile and a half over uneven rocks, roots, and steps. Doing flats and even uphills with a heavy pack is manageable, but going downhill at a 25% grade with 40lbs on your back is killer.

Roots and steps for almost two miles

We finally staggered into Paso Camp 5.3 miles away from Los Perros after 3 hours and 15 minutes of hiking. Paso for us was just a quick pit stop to check in with the rangers, refill water and eat a snack, but it’s a full camp run by CONAF if you want to stay for the night. It’s extremely bare bones, so we’d recommend at least pushing on to Grey for the night.

Our total hike for day 3, with Paso marked at 5.3
Break time at Paso

After a quick snack, we pushed on from Paso and within a mile hit our first of a few super cool suspension bridges.

200 feet up in the wind, these bridges will test anyone with a fear of heights

The hike from Paso to Grey is manageable and stunning, paralleling the Grey Glacier as it runs into Lago Grey. You’ll catch glimpses of calving pieces of the glacier and unimaginably blue icebergs lazily floating in the lake.

Coming into Grey Camp, you get hit with a rush of humanity. After being on the circuit trek for three days, you’re now at your first W trek camp. There’s a mini mart, wifi, an outdoor cocktail patio at the Refugio, and a lot of freshly showered people who have no idea what Los Perros, Dickson, or the John Gardner Pass are.

After 5 and a half hours of hiking, we arrived at Dickson nearly 10 miles from Los Perros

We stopped for a well deserved lunch at the Grey kitchen house around 2PM after nearly 4,000 feet of elevation change over 10 miles. This would be a great full day for most folks. With the solid camping setup, well stocked mini mart and quality showers, bathrooms, and kitchen, it would be a nice place to re-provision and relax for a night.

The Grey Refugio and deck bar

Also note that this is the point on the trek where it’s not so strict to check in with rangers anymore. From Grey to Torre Central, the trek can be walked either direction (the W Trek), so you only need to check in with the camp operators (Vertice, Fantastico Sur, or CONAF) to confirm your nightly reservations.

To keep up with our itinerary, we pushed on from Grey for our last 7 mile push to Paine Grande. We were definitely struggling physically and mentally at this point and the landscape reflected our mood…

Very sadly, 40,000 acres of TDP were ravaged by fires started by an irresponsible tourist who lost control of burning toilet paper in 2011. A huge swath of the W trek from Grey all the way through Italiano have a similarly charred landscape for acres.

After 11 and a half hours on the trail and 8:33 of hiking time, catching sight of a camp never felt so good when we finally laid eyes on Paine Grande at 5:30PM. This was one of our favorite camps of the trek with similarly upscale amenities to Grey, including a ton of nice showers and the best kitchen house on the circuit.

Not a bad view from the Paine Grande camping area

Day 4: Paine Grande to Frances + Mirador Britannico

After getting quite lucky with the weather for three days, we were hammered pretty hard in the morning with rain and wind coming out of Paine Grande at the start of Day 4.

Day 4 on the trail

The section from Paine Grande to Italiano is more fast and easy hiking for 5 miles. Camp Italiano is another CONAF camp and similar to Paso in it’s bare bone amenities and it also serves as a little basecamp for the out-and-back section of the trek up Valley Frances. At this point, you can drop your big pack at Italiano to complete the Mirador and then return to the main circuit trail to grab it afterwards.

The tradition of the bag drop at Italiano

Note that there are two Miradors as you ascend up Valle Frances. Mirador Frances is only 1.3 miles from Italiano, though it’s over 1,000 feet of climbing over loose rocks and roots to get there. Reaching the mirador, you’re treated to stunning views and a soundtrack of constant avalanches from Cerro Paine Grande.

Cerro Paine Grande from Mirador Frances

The second Mirador, Brittanico, is another two miles and 1,000+ feet of climbing up the valley. Note that the rangers close this trail at 3PM and it’s strictly enforced, so we actually made it halfway then had to turn back due to light. If you’re strapped for time, Mirador Frances is plenty spectacular and that round trip from Italiano is only two and a half hours of hiking versus the four plus hours you’d need to round trip Brittanico.

Rio del Frances running up Valle Frances

You could trek back down and stay at Italiano for the night, but Sara and I had planned to stay at Camp Frances another mile down the trail from Italiano. Frances is a Fantastico Sur camp with treehouse-like tent platforms set into the forest whereas Italiano is another CONAF camp low on amenities, so we were super happy with our decision.

Platform camping at Frances

Though Frances is laid out a bit strangely, there are recently built upscale showers and you have the ability to cook food outside right on your platform

**Note below that we doubled back to the Mirador after dropping our packs at Frances and trying (and failing) to check in, so we did two extra miles. Check in doesn’t start till mid afternoon, so we highly recommend the Italiano bag drop then going to Frances after the Mirador.

Day 5: Frances to Torre Central

Though we were super tired by this point in the trek, Day 5 was a truly spectacular day of hiking. We hit the road early before breakfast and stopped a little over 2 miles later at Los Cuernos for food. This was a solid strategy since they have great amenities, a kitchen house, and a bar/restaurant.

The bar and restaurant at Cuernos

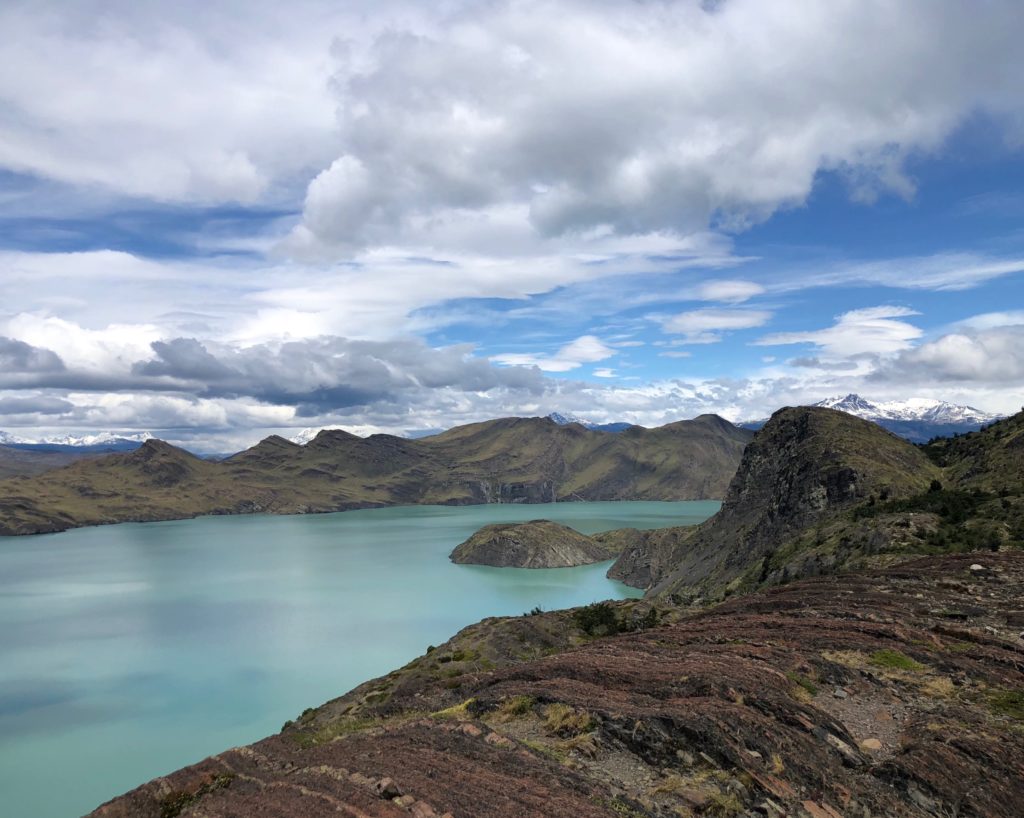
For the next 8 miles from Cuernos to Torre Central, you travel along a well maintained strip of trail between the incredible Lago Nordenskjold on one side and granite spires that rise 5000 feet on the other.

Nearly 70 degrees and sunny along Lago Nordenskjold

Note that at the 7 mile mark from Frances, there’s a split in the trail where you can either go the direction of Torre Central (our destination for the night and where we started the trek) or Chileno, a camp further towards the Torres Del Paine. In hindsight, we would have likely stayed at Chileno that night and gotten up early for the dawn hike to the Torres, however Chileno was full due to our late booking.

Frances to Torre Central, with the split to Chileno marked at 6.9 miles

We took it pretty easy on the hiking on day 5, covering the 10.4 miles and 2,700 feet of elevation in 4:42 of hiking time with extensive breaks for pictures and food.

Our stop for the night was the Refugio at Torre Central, an upscale hostel-type accommodation with a restaurant, bar, and common areas for lounging. At this point, we we were right back where we started the trek and just needed to do the out and back to the Torres Del Paine to complete the full circuit.

Lounge at the Torre Central Refugio

Day 6: The Torres Hike

The final day! It’s generally accepted that the best time to view the Torres is dawn, when they catch a stunning morning light and are typically more visible. Traditionally many people will wake up around 3AM (or 1AM in the case of two girls in our Refugio) and make the trek to the base in bitter cold by headlamp to watch the sun rise. Many told us a smart move is bringing a sleeping bag up there to stay cozy in while you wait.

Since Bus Sur and Bus Gomez both leave the Laguna Amarga stations at 2 and 2:30 respectively, a typical final day is for folks to do the dawn round trip hike to the Torres and then be down to Central with a few hours to spare before hopping on the shuttle.

We decided to extend our stay an extra day with two total nights at Torre Central, so we took a more relaxed approach and hiked up mid morning rather than at dawn. Another big perk of staying at Chileno rather than Torre Central is you’re already 3.6 miles and 1,500 feet of climbing closer to the Torres if you’re attempting the dawn hike.

Trekking up the valley towards the Torres!

Despite the fact that you can leave your packs either at Central or Chileno depending on where you stay, this out and back is by no means easy. For us, it was 13.3 miles with 4,350 feet of elevation change.

The Torres hike from Central with Chileno marked at 3.6 miles

Though the hike that day and the Torres themselves felt like a culmination of a bucket list trip, it was nonetheless very crowded. Like Disneyland crowded. We found ourselves reminiscing with friendly faces from the circuit trek about the solitude between Seron and Grey. If we had to do it over again, we’d most likely do the dawn hike to the Torres to avoid the crowds then head out that day on the bus.

Our experience going through Chileno camp on the way to and from the Torres summed up Patagonian weather in a nutshell: on the way up, we sheltered in the Refugio to wait out a hailstorm and on the way back, we hung out at the outdoor tables drinking beer in the sunshine.

Coming into Torre Central in the afternoon, we were riding a high of adrenaline as we completed the 80 mile circuit and the trek of a lifetime! A home cooked meal at the refugio and a bottle of wine never tasted so good.

Sample Itineraries

While we were super happy with our trip, there are a few potential changes you could make if you booked far enough in advance to get any site you want.

The first is our itinerary below, with the second being an ideal schedule with an easier day 3 and easier dawn Torres hike. The third option would be ideal for people who want easier hiking, with the 4th being optimized for very easy hiking and comfortable stays. A great call would also be to add Dickson to option 2 and maximize your time on the backside of the trek. also remember that daylight will play a huge factor, so the closer you go to the summer solstice, the better.

Sun still shining at 10PM

If you want to go the cheapest route possible, Italiano and Paso are actually free camps and you can do just the camping option at other places for minimal spend.

5 Night, 6 DaySeron, Perros, Paine Grande, Frances, Torre Central
5 Night, 6 DaySeron, Perros, Grey, Frances, Chileno
7 Night, 8 DaySeron, Dickson, Perros, Grey, Paine, Cuernos, Chileno

Hiking Chart – Distance, Difficulty, and Times

As alluded to previously, all hiking mileage is not the same in Torres Del Paine. Note that we hiked fairly fast compared to most folks out there and the CONAF hiking times on the map were generally about 25% longer than the time it took us.

StartEndMileageElevation ChangeHiking
Time (hrs)
Torre CentralSeron8.21,0303.0
SeronDickson11.31,3004.0
DicksonLos Perros7.62,6503.25
Los PerrosPaso5.32,8003.25
PasoGrey4.41,0002.25
GreyPaine Grande6.81,1003.0
Paine GrandeItaliano5.01,0002.25
ItalianoM. Frances (RT)2.61,3002.5
ItalianoBrittanico (RT)6.92,200NA
ItalianoFrances1.02000.5
FrancesLos Cuernos2.35001.25
Los CuernosTorre Central7.12,2303.5
Los CuernosChileno11.32,100NA
Torre CentralChileno3.61,2001.5
ChilenoTorres Base (RT)62,3453.0

What to Pack

What you bring to Torres Del Paine is highly dependent on how you tackle the trip. As mentioned before, finding a good hotel like Simple Patagonia that will store your luggage for you while you’re in the park is key.

It all starts with a good trekking backpack

The Essentials

  • Hiking Backpack w/ hipbelt (ex: 75+10L Deuter Aircontact Backpack and 50L Osprey Aura) – A hipbelt can transfer 80-90% of the weight off your shoulders. Be sure to get one with a rain cover or buy one separately for the pack
  • Packing Cubes (ex: Eagle Creek packing cube sets) – Super lightweight organization system for hiking backpack or suitcases that you can’t live without after you’ve used them
  • Hooded Waterproof Shell (ex: Arcteryx Alpha) – well made from Goretex that’s windproof with pit zips to dump heat when conditions change quickly
  • Down Jacket (ex: Patagonia Micropuff Jacket) – extremely light, packable, and warm
  • Mid Layer (ex: Arcteryx Konseal Quarter Zip) – warm but breathable
  • Base Layer (ex: Patagonia Capilene Quarter Zip) – breathable and sweat wicking
  • Hiking Pants (ex: Patagonia Quandary Pants) – multi stretch, breathable, durable, two zip pockets
  • Waterproof Pants (ex: Outdoor Research Helium Pants) – like wearing something as waterproof as a garbage bag but more breathable
  • Hiking Socks (ex: Smartwool)
  • Hiking Boots (ex: Altra Lone Peak 4) – whatever you bring, be sure they’re broken in and comfortable

For pretty much any temperature and weather condition, you’ll be comfortable wearing a t shirt or workout shirt with any combination (or all) of the layers listed above. With only one of each item, your layering will weigh around a pound or so.

Our Additional Gear List

Below are categories with all of the gear that Sara and I brought along. While we didn’t weigh them, our packs at their peak early in the trek were likely over 90 pounds between the two of us. While this isn’t crazy, you could certainly do the trek much much lighter if you did it more supported

Our 4 star accommodations for the trek

Eliminating camping gear, food, and kitchen supplies could shave 15-20 pounds off your pack weight. And as mentioned in the camp section, the W camps like Grey, Paine Grande, Los Cuernos, and Frances have stocked stores and restaurants, so even if you bring all your own camping gear, you can limit the food you bring and buy as you go whereas we wanted the full experience

Gear List

Camping Equipment

  • MSR Hubba Hubba NX two person tent w/ rainfly (3lb, 13oz)
  • Marmot Sawtooth down sleeping bag (2lb, 10oz)
  • Sea to Summit Aeros inflatable pillow (4oz)
  • Black Diamond Apollo rechargeable lantern (11oz)
  • Black Diamond storm headlamp w/ spare batteries (4oz)
  • Anker Power Core external battery + phone USB (13oz)
  • Garmin Fenix GPS watch + USB charger (5oz)
  • Katadyn Hiker Pro water filter (11oz)
  • ThermaRest Neo Air X Lite sleeping pad (12oz)
  • Trail Buddy Trekking Poles (1lb, 9.5oz)
  • REI Multitowel (3oz)
  • Travel soap, shampoo, sunscreen, toothpaste, toothbrush (6oz)

Base Camping Gear Weight: 19.2lbs

  • First Aid Kit, Moleskine, Duct Tape (12oz)
  • Playing cards + paperback book (12oz)
  • Kathmandu Axion 12L Run Pack (1lb)
  • Filled 3L Water Bladder (7lb)
  • Fuji XT2 mirrorless Camera (3.5oz)
  • Fuji XR 16mm Prime Lens (9.5oz)
  • Ubeesize mini tripod (3oz)

Total Camping Gear Weight: 27.4lbs

Kitchen + Food

Our stove and kitchen set up
  • MSR Pocket Rocket Stove (2.6oz)
  • Propane (8oz)
  • GSI Outdoors Dualist cookset (pot, 2 bowls, 2 mugs, tops, sporks) (1lb, 5oz)
  • 2 Lighters + UCO Stormproof Matches (3oz)
  • 5x Garbage Bags, 8x Quart Plastic Bags
  • RX Bars and Epic Bars – 30ct (3lb, 8 oz)
  • GoToobs (2 filled with olive oil, one with hot sauce) (10oz)
  • 1x Coconut oil small jar (12oz)
  • 1x small containers of salt and pepper
  • Backpacker’s Pantry dehydrated meals (3lb)
  • Patagonia Provisions dehydrated meals (2lb)
  • Wild Planet Skipjack Tuna (2lb)
  • Trail Mix + Dried Fruit (1.5lb)
  • Whey Protein (6oz)
  • NUUN Electrolyte Tabs (4oz)
  • UCANN Superstarch (6oz)
  • Four Sigmatic instant coffee single serving (3oz)

TotalKitchen + Food Weight: 16.9lbs

Clothes

  • 1x Patagonia full zip fleece (for camp/sleeping)
  • 4x Wicking SS shirts (one for sleep)
  • 1x Sunglasses with croakies
  • 1x Hiking shorts
  • 5x Underwear (ex: Exofficio)
  • 4x Smartwool hiking socks (2 long, two short)
  • 1x Smartwool long underwear
  • 5x Short socks (under hiking socks daily)
  • 1x Workout shorts for camp/sleeping
  • 2x Beanies (one fleece insulated)
  • 1x Hat
  • 1x fleece gloves (w/ optional Smartwool liners)
  • 1x Buff
  • 1x Sandals

Total Clothing Weight: 10.5lb

TOTAL PACK WEIGHT: 55lbs

Where to Provision

Sara and I brought all of our gear plus the dehydrated food and bars, however a lot of people provision their food and some gear in Puerto Natales or along the way in Calafate or Punta Arenas. We walked into some gear shops and noticed that clothing especially is outrageously expensive. Save some time in Puerto Natales to hit up a camping store for a propane canister and any odds and ends you might need. There’s also a Unimarc grocery store that wasn’t especially well stocked, but we grabbed some extra lentils, rice, nuts, and spices there the day before our trek.

Summing Up

Spending 6 days in the natural world carrying everything you need on your back provides such incredible perspective on your place in the world. And there’s no more magical place to do it than Torres Del Paine.

I’ll leave you with one of my favorite pictures of the whole trip….with only a mile to go to Torre Central, Sara stopped to look back and contemplate things for a while. Enjoy!


For more great hiking trip reports, gear guides, and ideas for outdoor adventures, sign up for a non spammy every other week email below:

Copyright © 2025 · Monochrome Pro on Genesis Framework · WordPress · Log in